Saturday, June 28, 2008

PhotoshopPaintingTutorial


Ancient-Pig's Photoshop texture painting tutorial

Thursday, June 26, 2008


check out!
this is my second semister VFX specilization work.
critic always welcome

Wednesday, June 25, 2008

the RED camera

ok monsters you probably heard bout this but here it is anyway, introducing the new cameras from RED, high features and the cost (one tenth that of an HD cam !) makes it droolworthy. Do visit the site aptly named ------> http://www.red.com/

Several of the models are up for release only in early 2009, one of them is out though and here is the image, for more visit ---------> http://www.red.com/cameras

Wednesday, June 18, 2008

VFX Schedules


More reader questions regarding schedules

What is a 'Shot Timeline'...is this some sort of
device used to tell the amount of time the shot should
last for or what. You also made mention of some types
of, magnetic boards, modified storyboards or computer
software which is most effective.


Scheduling is a big issue since you have a lot of resources and need to deliver in a timely manner.
There are at least 4 types of schedules. They can be corkboards, on the computer, magnet strips, etc. The specifics are
up the vfx production team (producer and supervisor)

1. Schedule of the shots. This is the true linear time estimate and is usually in a timeline. That timeline will be the length of the production.
It may list that shot KR030 starts June 14 and completes August 19. The shot itself is likely to be budgeted for less time but you have to take some delays into account. (changes from the director, waiting for feedback, shooting an extra element, etc)
Each shot laid out may also show the different stages (animation, TD, roto, etc)

2. Target shots - These are shots due in the next couple of weeks. These may just be names of the shots or their storyboards on a simple wall chart that's broken down by days.
The production team can review this and say next week they expect to complete KR040 on Wednesday. If shot RM125 won't be done this Thursday as planned then it will be moved to the next week at the likely day. This is so the team can focus on the immediate needs.

3. Storyboards - This is all the storyboards laid out in film order. Each has a breakdown of the different tasks and the initial scheduled dates. As work is done a colored dot may be applied that indicates which stage is done. (i.e. finished with matchmoving and layout, ready for animation) Red dot signifies a completed (finaled) shot or folding up the corner of the storyboarded breakdown. The storyboards may be replaced or augmented by stills from the actual footage. Most productions attach bulletin boards in the production office for this. This allows everyone to see the big picture. You get a true sense for what's been done, how much work remains and if there are some shots that are being overlooked.

4. Schedule of artists - Your key resources are the artists. There's a timeline with each artist (TD, animator, compositor, etc) that lists what shots they're scheduled to work on and when. An artist may be working on 1 to 5 shots at a time. After completing a shot the next shot for them is already scheduled. If a director adds a additional shots or something changes in the schedule then the production team will review this board/timeline to see who's available and what they should re-assign. If they need a shot sooner than expected it may have to be moved forward in the schedule and given to a different artist.


How are 'final shots' determined. If the feature
film has about 25 effect shots how can I conclude that
I am expected to get 5 final shots a day for 5 days.
Also, what happens if the finals isn't what the
director had in mind...will the shot be repeated and
isn't this waste of time.


A shot may be internally finaled by the supervisor but it's not truly finaled until approved by the director.
It's important to understand the director was involved in all stages of the shot (from the original design, the shoot and now post production) The director will have seen the shot tests from animation and at least preliminary renders and composites. This has to be done so they can cut it into the film and judge it context. Changes can occur at any point. If the director doesn't final the shot when it's expected to final it's usually because the final polish hasn't been done to their liking. Note that even after a director has finaled a shot it could still be unfinaled at some point later (studio hates it, new concept). In these cases that's a major change order (time and money).

Time - If you have 25 shots due in 5 days then you have to final an average of 5 shots a day. To calculate this you take the the number of shots left to do and divide by the remaining time you have (assuming 5 day week that the director can approve them). This will give you the average number of shots per day. You can just as easily calculate number of shots per week or average days per shot. The initial time is based on the date when you have the turnover of the shots (when they've been edited and production tells you these are the takes, shot numbers and details).
You're likely to start off woefully less than the average at the start of post production since you have to fill the pipeline and it can take some time to get the film scanned, cleaned, matchmoved and ready to work on. The number of shots actually finaled rises exponentially as you get closer to your finals date (contractual day you have to complete so they can get it in theaters). More things will have been worked out, the crew has hit their stride, the director and supervisor are now seeing through new eyes (200 shots in the next two week, akkkk!), you're waking up in a cold sweat at night and hopefully the studio has stopped fiddling with the shots.


Here are the reference links :

http://www.nilesheckman.com/work_experience/Heckman_Set_Documentation_Dec_2006.html

Depth of Field and VFX


http://www.istockphoto.com/generic_image_view.php?ID=7271


Depth of Field and VFX

This is in response to a question from a reader about depth of field and how it relates to visual effects.

Models
With miniatures you need enough depth of field to hold focus from the front of the model to the back of the model. This means a lot of light and a stopped down lens. Lack of depth of field is one of the key things that give away the look of the model since in real life a large area would be photographed from a further distance and (possibly in sunlight) so depth of field wouldn't be a problem.

Greenscreen/Bluescreen
If you're shooting a greenscreen then you'll typically want to make sure all the foreground people and objects are in sharp focus. This is easily and frequently overlooked, especially by directors of photography. (And at times by the VFX supervisor) If you have a sunlit, exterior background image then it's likely to be shot at f8-f16. This provides a reasonable amount of depth of field. But when the DP lights the stage he probably won't be lighting to same intensity levels. If the lack of depth of field is apparent then it causes two problems. If the back end of the foreground is soft then you're forced to blur the background even if there's something important to see. It's impossible in real life to have only a mid-section that's blurred. If the director really needs to see what's back there then you're forced to try to sharpen the edges and back detail of the foreground. The end result will never appears natural. The other problem is the audience senses that this is unnatural (i.e. they only see this in vfx shots). An 'exterior' scene in bright sunlight with a normal or wide angle lens should be in focus throughout a normal shot.
You'll see animated films where they have cheated the depth of field. I find it best if you want your vfx or animation to appear natural is to use the guidelines and restrictions that a normal movie has. (depth of field, camera movement, etc)

Markers
The other depth of field issues for VFX people is soft tracking markers and very soft edge mattes. If you're on a stage shooting a greenscreen with a long lens then the markers may be so out of focus as to disappear. This is a big problem, especially if you're shooting a character from the waist up who's moving and jumping around. Since the markers are invisible, you have no easy way of distinguishing the camera motion from the character motion. Someone will have to manually work on that shot by eye until it looks reasonable. This can be very time consuming and require a number of takes.
Note that LED markers tend to hold up better for out of focus shots. These are markers using key ring lites (possibly modified) you see in the store. The point source of a red LED holds up better than an X piece of tape.

Mattes
The soft edges of the greenscreen matte (or a place you want the roto matte) will require delicate settings of the key. Any blur (from depth of field or motion) will cause some of the background to bleed through that area as if it were partially transparent. The blurred area then becomes more contaminated with the greenscreen. When rotoing a blurred edge it's sometimes a subjective question where the blur stops. If you include all of the blur then you'll be including some of the original background. If you clip off too much of the blur then it will look incorrect in the composite unless you blur the edges of the matte similar to the original. Fortunately software like Commotion could deal with natural motion blur so it was less of an issue. If you shot someone slightly soft in front of bright points of light (city, Las Vegas, etc) then in the edges of the blur you would have points of light that likely aren't in the new background. In these cases you may have to clamp down or paint out the offending lights.

http://www.photoaxe.com/depth-of-field-photography-tutorial-part-3/


Given link will demonstrate you more detail abt it. 


Designing Visual Effect Shots


 The image “http://www.matt-adamson.com/img/xm2.gif” cannot be displayed, because it contains errors.http://i133.photobucket.com/albums/q80/Oregon_Sunset/Ball%20HydroCarbon%20Review/IMG_8263.jpg


Designing Visual Effect Shots, Part 1

(This posting started getting very long and cover a lot so I’m breaking it into smaller postings. I’ll get into more specific details in future postings.)

The success of a Visual Effects shot is not only dependent on the technical aspects of the shot but also the creative aspects. It all starts with the initial shot design.

A well designed visual effects shot will have impact and help to tell the story clearly. A poorly designed shot may confuse the audience and at the very least will squander an opportunity. A poorly designed shot can actually cost more if the studio or director decides in the edit stage that it’s just not working. At that point the shot could be re-shot with a better design (unlikely) or many attempts will be made to fix the shot in post without a clear understanding of the problem.

Note that the design criteria for visual effects versus normal live action shots are primarily the same. The differences with visual effects shots are:

1. Usually the entire visual effects shot is not visible or apparent at the time of shooting. Images will be added later or the existing image will be modified. This requires pre-planning. A live action shot is usually working or not working on the set. If a camera angle makes a stunt look boring then they’ll know that when reviewing the video on set.

2. On live action the Director of Photography and Camera Operator are focused on the look of the shot in addition the director. The director respects their opinion. With visual effects the director and a storyboard artist may have designed the initial shots before the visual effects people are even hired. How much influence the visual effects supervisor and his team have on shot design depends greatly on the director and how much respect they have for the visual effects process. The better directors understand this and take advantage of the visual effects team.

3. Visual effects sometimes deal with design issues that don’t come up directly in live action. How to show the scale of smooth object floating in space? How to transform this paperweight into a creature?

4. Visual effects can be much more limitless. With live action you have set and equipment restrictions which may prevent you from doing certain types of things. A visual effects shot can have more freedom of action, movement of camera and lighting effects.

5. Visual effects can require a deft hand of design and editing just as a comedy sequence requires some finesse of timing, angles and specific phrasing.
Spider

Below are some of the many issues to keep in mind when designing a visual effects shot. These aren’t rules, just a set of suggestions.


http://www.williampolito.com/blog/images/3/shot_framing_lg.gif
Does the shot help to tell the story?
This should be a fundamental of any shot or scene in a film, whether live action or visual effects. Sometimes visual effects are only used as eye candy. The director wants to wow the audience with a car crash, explosion or a visual effects shot. If that can be done and still work to tell the story then that’s great. If it’s only purpose is eye candy to wow the audience then it may be a lost cause.

Audiences these days have seen a lot visuals between films, tv, video games and the internet. They’ve come to expect something new and different. Visual Effects are not as special and magical as they once were to the audience. There was a wow factor in the early days of computer graphics when things were new. It becoming more difficult to find techniques that provide the wow factor. Shot design is a major factor to making the wow factor even using standard techniques. As a case in point, THE MATRIX used ‘bullet’ time and most people thought this was the first use of it. There had already been at least one movie with the same effect (LOST IN SPACE) and a few commercials but the combination of art direction and design combined with the story made an impact.

Even in the early 80’s people thought much of what they saw was computer graphics. A number of visual effects commercials were designed to look like computer graphics even though many of these were done by traditional animation techniques. Logos would fly through the air with metallic glints. These were all done with a number of pieces of artwork and passes on an animation stand. For ESCAPE FROM NEW YORK at Dream Quest we used physical models of building painted black with white lines.

What is the point the shot has to make?
Maybe it’s to establish a castle or to show a creature emerging from a box. Whatever the reason it’s important to keep that in mind throughout the process. Given the length of time from the initial design to the completed final, the shot can veer off course quite a bit.

At the time of shooting someone may have a ‘better’ idea. Why don’t we frame it like this? Why are we wasting all of that frame area there? This is when the visual effects supervisor has to remind them that the empty area on the side will hold a creature in the final shot. Another reason why storyboards are essential is to provide a clear visual of the final shot. More likely it will be a subtle change that will have a big impact later. (Let’s put this prop here, lets add a real explosion in the foreground.)

In post production the editor may want to reframe the shot or use a different element entirely. The compositor may put in more smoke in the foreground. Everyone involved in the shot (director, supervisor, animator, technical director, etc) are likely to be focused on the details and lose sight of the purpose of the shot. In an attempt to make the shot even ‘cooler’ you lose the focus of the shot. It’s only when it’s cut in will the real problem become obvious again. The reason for the shot may now be so obscured that the audience will be confused and lost. If that’s the case it throws them out of the movie. Try to always review the shot in context and take a step back to check the intent of the shot.

Does the shot fit in the movie? Does it fit into the sequence?
Unless it’s a specific dream sequence, most visual effects shots are supposed to blend into the rest of the film. This is true whether it’s a period piece or a science fiction future thriller. The design of the shots, the camera motion and the lighting should match the live action. If you have a hand held action sequence and cut to a locked off visual effects shot, then it will stand out.

My suggestion to directors is to design the shots as if everything is really there. How would you frame and shoot this in live action? There’s a tendency to treat the design of even simple visual effects as different than the rest of the film. “We’re paying for the shot and by gosh we’re going to show it off” is sometimes the approach taken. If it’s a real building they might frame it from a ¾ angle and not make a big deal of it. If it’s a matte painted building then it’s likely to be designed to be shot straight on with clouds added to the sky. All of those are clues to the audience that something about the shot isn’t right.

It’s possible for a disconnect to happen since the director usually sits down with a storyboard artist months before shooting. These shot designs may be a different aesthetic than how the director of photography approaches the live action. The director is involved with both teams but there are thousands of choices to be made that may place them out of sync. There may be times a second unit director is approaching the shots differently than the main director. Sometimes in post the director realizes he can change a lot, especially on a virtual shot Focusing on a hand full of shots may cause them to shift away from the rest of the film.

Adjust the design of the shots based on their context and what they’re supposed to accomplish. If they’re supposed to be realistic backgrounds then all the more reason to fit them into the rest of the movie and avoid drawing attention to them. Once again, how would you treat this if it really existed? If it’s a dramatic effect then design the shot to take advantage of that and push it within context of the film.

(more design posts to come)


Planning toward shot

Here is a basic visual effects lesson for those just starting out:

1. Think of a simple concept to do as a test shot.
Do this as a still so you don't have to worry about moving images,interlacing, compressed video, etc.
Select something that is realistic - feasible and believable. (i.e. no pink whales type creatures with feathers floating in the clouds.)

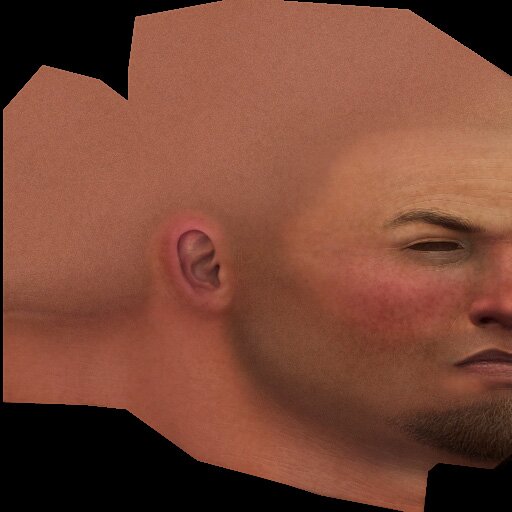
2. Shoot the background with and without a reference. Repeat step 1 if you can not shoot a reference. If you're going to composite a person in the scene shoot it with and without a person. If you're going to create and render a CG model then put in the real object you're duplicating.

3. Shoot or create your additional elements.

4. Composite this image with the background. Adjust until it looks real (without looking at the reference).

5. Compare this result with your reference. Do they match? If not, repeat adjustments (color, matte edges, etc) until it does. You may find you have to go back to the shooting of the FG element or modeling and rendering to get it to work.

6. Try some variations- put the object in the far background if you have an outdoor scene. You'll see how atmospheric perspective comes into play. What matched up front no longer looks real when reduced and placed in the background. Move the image to an area with different lighting. See how that stands out.

There are a number of lessons to be learned here (I'll cover some of these in more detail in future podcasts):

1. You don't need a teacher or VFX supervisor to tell you if you've gotten the objective issues of a shot correct.
With a real reference as both a reference and a goal, keep thinking what's wrong with this picture.
You will have creative and subjective issues in the future but for now you're focused on how to obtain a match.
A good visual effects crew member is able to take the ball and run with it to the point where only creative issues need to be discussed.

2. What you think was real and what was actually real are probably two different things. Bounce light, highlights, shadows and textures are all issues that can be surprising.
What the director wants and what's cinematic are two additional variations. These four things may match or may be wildly different.

3. A reference clip or still is handy to have when shooting or creating your other elements.

4. Do you know your tools and techniques well enough to accomplish this? If not take a look at your problem area and try to learn more about it.

5. Developing your eye takes time and effort. It involves making observations of what happens in real life and what happens in photography. Learn to see.

6. Creating reality has the advantage that you can have a real reference and that you know exactly what it needs to look like.
Creating a pink whale type creatures with feathers floating in the clouds doesn't offer that. It will always be something of a guesstimate on exactly how that would look and it will more likely be a creative decision.
A totally fictional and impossible image is always going to be 'unreal' even with the best rendering and compositing. Your mind knows it can't exist and each person is going to imagine it should be a slightly different way, if it were real. It works because the audience is hopefully willing to suspend disbelief, especially if it's a good story.

Future projects:
Repeat with different scenes. If you created a CG object place it in these new scenes.
Try with multiple objects or people.

Next try with moving footage. If you're an animator try the same thing.
Have a person walk and jump over something. Try to re-create that.

Good luck.

Tuesday, June 17, 2008

k guys here's something that i whipped up in my spare time nothing great really but there it is !

hola everyone ! i'm joseph aka cragnomac